TABLE OF CONTENTS
- Description of user roles
- How to Invite Users
- How to Edit User Roles
- How to Remove User Access
- How to Grant Access to Multiple Merchant Accounts
Effectively managing user access is critical for ensuring both the security and smooth operation of your Merchant Portal. Below, you’ll find step-by-step instructions for inviting new users, editing their roles, and deleting accounts. Additionally, this guide includes a detailed overview of the available user roles and their permissions.
Description of user roles
| Admin | Finance | Viewer | Support | Refunds Specialist | |
| View the list of merchant portal users | + | ||||
Invite new users and assign their roles | + | ||||
View the Merchant's balance | + | + | |||
Browse all the transactions | + | + | + | + | + |
Create new transaction reports as required | + | + | |||
| Download transaction reports in CSV format | + | + | + | + | |
| Execute Refunds | + | + | + | ||
| Browse the integration documentation | + | + | + | + | + |
To invite, edit, or delete users in the Merchant Portal, two-factor authentication (2FA) must be enabled in the Settings menu. Additionally, only users with an Admin role have the permissions required to perform these actions.
When inviting a new user, they will gain access to the specific merchant_guid associated with the Merchant Account ID selected during the invitation process.
How to Invite Users
Inviting users to the Merchant Portal is straightforward. Follow these steps to securely add new users:
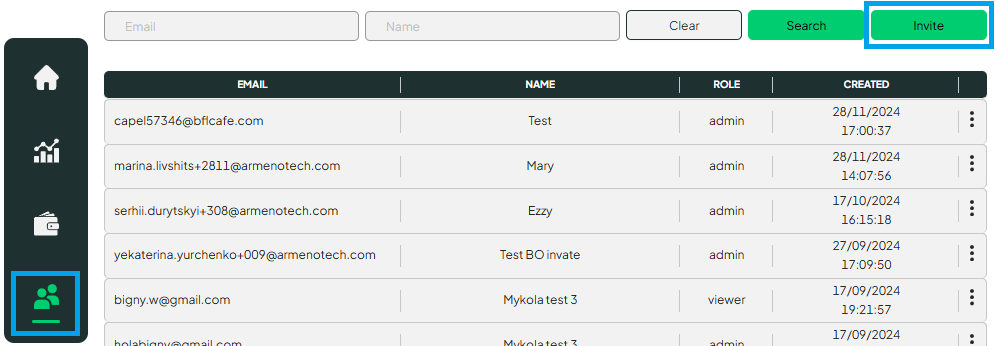
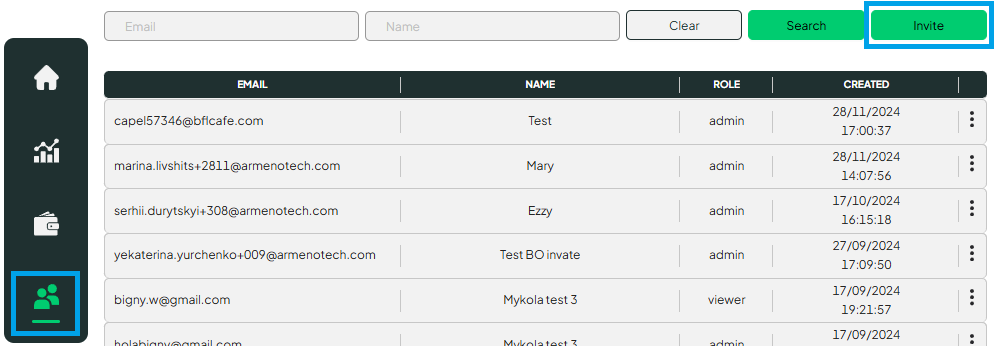
- On the left sidebar, open the Users menu.
- Click the Invite button located above the table on the right side.
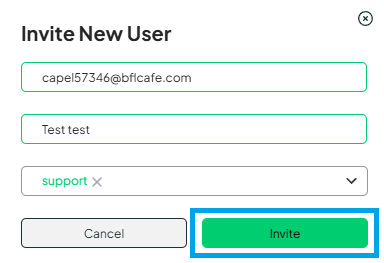
- Fill in the required user details in the form.
- Click the Invite button to proceed.
- Enter the 6-digit verification code generated by your Authenticator app.
- Click the Authenticate button to confirm the invitation.
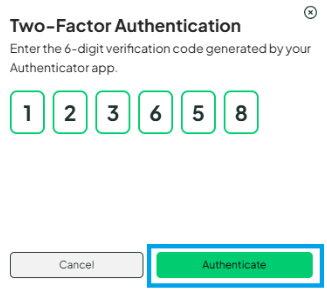
Once authenticated, the invitation will be sent to the new user.
How to Edit User Roles
Editing user roles in the Merchant Portal is simple. Follow these steps:
- On the left sidebar, open the Users menu and locate the user whose role you want to edit.
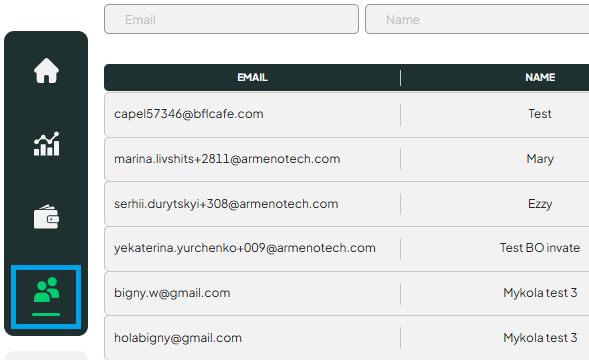
- Click the options button (three vertical dots) on the right side of the user’s entry and select Edit.
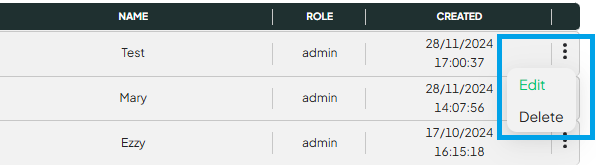
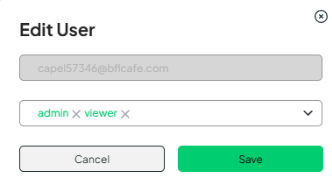
- Make the necessary changes to the user’s role.
- Click the Save button to apply the updates.
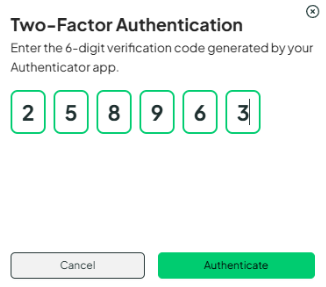
- Enter the 6-digit verification code generated by your Authenticator app.
- Click the Authenticate button to confirm the changes.
The user’s role will be updated successfully after authentication.
How to Remove User Access
To remove a user’s access from the Merchant Portal, follow these steps:
- On the left sidebar, open the Users menu and locate the user whose access you want to remove.
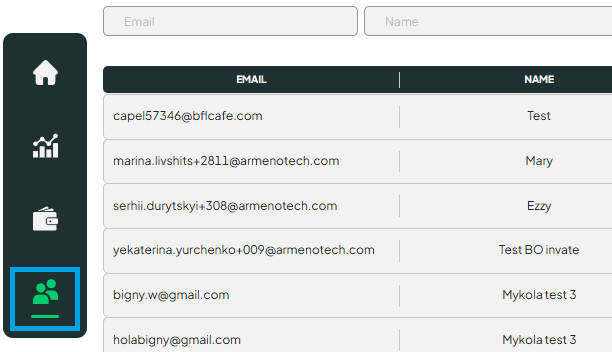
- Click the options button (three vertical dots) on the right side of the user’s entry and select Delete.
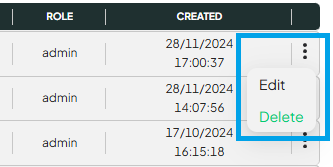
- Confirm by clicking the Delete button.
- Enter the 6-digit verification code generated by your Authenticator app.
- Click the Authenticate button to finalize the deletion.
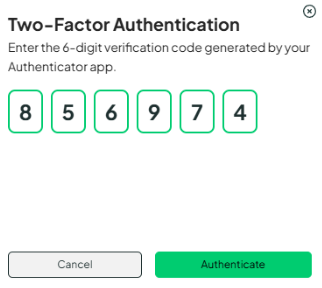
The user’s access will be removed once the process is authenticated.
The user will no longer have access to the selected merchant account, but their overall user profile will remain active.
How to Grant Access to Multiple Merchant Accounts
To grant a user access to multiple merchant accounts, follow these steps:
- Log in to the Merchant Portal as an Admin.
- Select the merchant account you want to grant access to.

- Use the Invite User feature to invite the user to the selected merchant account.
- Switch to a different merchant account by selecting it from the list.
- Use the Invite User feature again to invite the same user to the new merchant account.
- Repeat steps 4–5 for all additional merchant accounts as required.
The user will receive separate invitations for each merchant account, enabling them to access all the assigned merchants.
Was this article helpful?
That’s Great!
Thank you for your feedback
Sorry! We couldn't be helpful
Thank you for your feedback
Feedback sent
We appreciate your effort and will try to fix the article